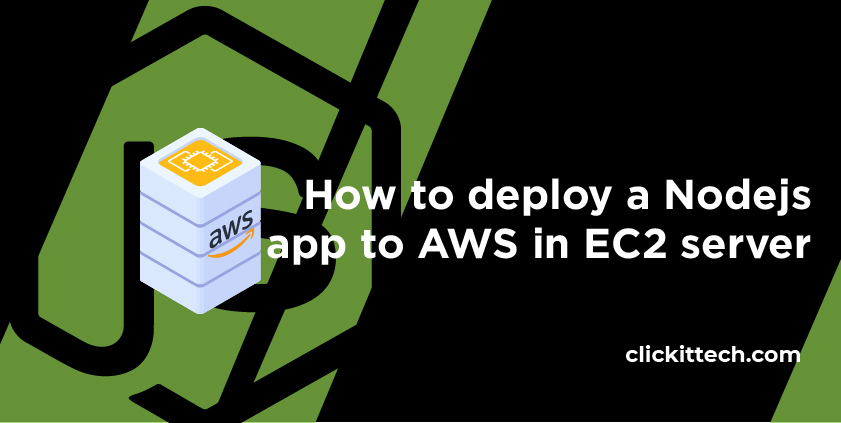
Istnieje wiele sposobów wdrażania aplikacji Nodejs, czy to w chmurze, czy lokalnie. Jednak nie chodzi tylko o wdrożenie aplikacji, ale o wdrożenie jej we właściwy sposób. Bezpieczeństwo jest również ważnym aspektem, którego nie należy ignorować, a jeśli to zrobisz, aplikacja nie będzie działać długo i istnieje duże prawdopodobieństwo, że zostanie naruszona. Dlatego jesteśmy tutaj, aby pomóc Ci w krokach wdrażania aplikacji Nodejs na AWS. Pokażemy Ci dokładnie, jak wdrożyć aplikację Nodejs na serwerze przy użyciu kontenerów Docker, RDS Amazon Aurora, Nginx z HTTPS i uzyskać do niej dostęp za pomocą nazwy domeny
Spis treści
Stos narzędzi
- Architektura: Wdróż aplikację Nodejs na serwerze ec2 za pomocą kontenera Docker, RDS Amazon Aurora, Nginx z HTTPS i uzyskaj do niej dostęp za pomocą nazwy domeny
- Wymagania wstępne
- Utwórz instancję Ubuntu 20.04 LTS EC2 na AWS
- Utwórz RDS Aurora z instancją MySql na AWS
- Zainstaluj zależności w instancji EC2
- Wdróż aplikację Nodejs w instancji AWS EC2 za pomocą kontenera Docker, RDS Amazon Aurora, Nginx z HTTPS i uzyskaj do niej dostęp za pomocą nazwy domeny
- Co dalej z wdrażaniem aplikacji Nodejs na AWS?
- Wniosek
- Często zadawane pytania
== Stos narzędzi ==
**Przykładowa aplikacja Nodejs**
Przykładowa aplikacja Nodejs z 3 interfejsami API, a mianowicie statusem, wstawką i listą. Te interfejsy API będą używane do sprawdzania stanu aplikacji, wstawiania danych do bazy danych i pobierania& wyświetl dane z bazy danych
**Instancja AWS EC2**
Do wdrożenia konteneryzowanej aplikacji Nodejs zostanie użyta instancja Ubuntu 20.04 LTS Amazon Elastic Compute Cloud (Amazon EC2). W tej instancji zainstalujemy Dockera, na którym zostaną utworzone kontenery. Zainstalujemy również MySql Client na instancji. Klient MySql jest wymagany do połączenia się z instancją Aurora w celu utworzenia wymaganej tabeli
**AWS RDS Amazon Aurora**
Nasze dane będą przechowywane w AWS RDS Amazon Aurora. Będziemy przechowywać proste pola, takie jak nazwa użytkownika, identyfikator e-mail i wiek, które będą przechowywane w instancji AWS RDS Amazon Aurora
Amazon Aurora to relacyjna baza danych kompatybilna z MySQL i PostgreSQL dostępna na AWS
**Doker**
Docker to platforma konteneryzacyjna do tworzenia obrazów Docker i wdrażania ich przy użyciu kontenerów. Wdrożymy aplikację Nodejs na serwerze, Nginx i Certbot jako kontenery Docker
**Docker-Compose**
Do rozkręcenia kontenerów Nodejs, Nginx, Certbot użyjemy Docker-Compose. Docker Compose pomaga skrócić czas wdrażania kontenerów i zarządzania nimi
**Nginx**
Zostanie to użyte do włączenia protokołu HTTPS dla przykładowej aplikacji Nodejs i przekierowania wszystkich żądań użytkowników do aplikacji Nodejs. Będzie działać jako odwrotne proxy do przekierowywania żądań użytkowników do aplikacji, a także pomoże w zabezpieczeniu połączenia, zapewniając konfigurację umożliwiającą włączenie SSL/HTTPS
**Certbot**
Umożliwi nam to automatyczne korzystanie z LetâÃÂÃÂs Encrypt for Domain Validation i wystawianie certyfikatów SSL
**Domena**
Na końcu dokumentu będziesz mieć dostęp do przykładowej aplikacji Nodejs przy użyciu swojej nazwy domeny przez HTTPS, tj. Twoje przykładowe Nodejs będą zabezpieczone przez Internet
**Listonosz**
Będziemy używać Postmana do testowania naszych API, czyli do sprawdzania statusu, wstawiania danych i zestawienia danych z bazy danych
Jak powiedziałem, wdrożymy aplikację Nodejs na serwerze przy użyciu kontenerów Docker, RDS Amazon Aurora, Nginx z HTTPS i uzyskamy do niej dostęp za pomocą nazwy domeny. Â, pozwól nam najpierw zrozumieć architekturę, zanim dostaniemy się w nasze ręce
== Architektura: Wdróż aplikację Nodejs na serwerze ec2 przy użyciu kontenera Docker, RDS Amazon Aurora, Nginx z HTTPS i uzyskaj do niej dostęp za pomocą nazwy domeny ==
Wdróż aplikację Nodejs do instancji ec2 za pomocą Dockera będzie dostępna na porcie 3000. Ta przykładowa aplikacja Nodejs pobiera dane z instancji RDS Amazon Aurora utworzonej w tym samym VPC, co instancja EC2. Instancja Amazon Aurora DB będzie prywatna, a zatem dostępna w ramach tego samego VPC. Dostęp do aplikacji Nodejs wdrożonej na instancji EC2 można uzyskać za pomocą jej publicznego adresu IP na porcie 3000, ale nie
Dostęp do aplikacji na niestandardowych portach nie jest zalecany, dlatego będziemy mieć Nginx, który będzie działał jako Reverse Proxy i umożliwi zakończenie SSL. Użytkownicy będą próbować uzyskać dostęp do Aplikacji przy użyciu Nazwy Domeny, a żądania te zostaną przekazane do Nginx. Nginx sprawdzi żądanie i na podstawie API przekieruje to żądanie do aplikacji Nodejs. Aplikacja zostanie również zakończona SSL, dzięki czemu komunikacja między klientem a serwerem będzie zabezpieczona i chroniona
Oto schemat architektury, który zapewnia przejrzystość wdrażania aplikacji Nodejs w AWS
== Wymagania wstępne ==
Zanim przejdziemy do wdrażania aplikacji Nodejs w AWS, zakładamy, że masz już następujące wymagania wstępne
- Konto AWS
- PostMan lub jakakolwiek inna alternatywa na Twoim komputerze do testowania interfejsów API
- Zarejestrowana domena na Twoim koncie AWS
== Utwórz instancję Ubuntu 20.04 LTS EC2 na AWS ==
Przejdź do httpsAWS.amazon.com/console/ i zaloguj się na swoje konto
Po pomyślnym zalogowaniu się na swoje konto kliknij w pasku wyszukiwania i wyszukaj EC2. Kliknij wynik, aby przejść do pulpitu nawigacyjnego EC2 i utworzyć instancję EC2
Tutaj kliknij âÃÂÃÂUruchom instancjeâÃÂÃÂ, aby skonfigurować i utworzyć instancję EC2
Wybierz âÃÂÃÂUbuntu Server 20.04 LTSâÃÂàAMI
Polecam wybranie t3.small tylko do celów testowych, będzie to miało 2 procesory i 2 GB pamięci RAM. Możesz wybrać typ instancji zgodnie ze swoimi potrzebami i wyborem
Możesz zachować ustawienia domyślne i kontynuować. Tutaj wybrałem domyślną VPC, jeśli chcesz, możesz wybrać swoją VPC. Zanotuj, że tutaj będę tworzyć instancję w publicznej podsieci
Lepiej umieścić większą przestrzeń dyskową na 30 GB. Reszta może być domyślna
Przypisz nazwę oznacz dowolne wartości. Możesz nawet pominąć ten krok
Zezwól na połączenie z portem 22 tylko z twojego adresu IP. Jeśli zezwolisz na to od 0.0.0.0/0, twoja instancja zezwoli każdemu na port 22
Przejrzyj raz konfigurację i kliknij âÃÂÃÂUruchomâÃÂÃÂ, jeśli wszystko wygląda dobrze, aby utworzyć instancję
Zanim instancja zostanie utworzona, potrzebuje pary kluczy. Możesz utworzyć nową parę kluczy lub użyć istniejącej. Kliknij przycisk âÃÂÃÂUruchom instancje, który zainicjuje tworzenie instancji
Aby przejść do konsoli i sprawdzić instancję, kliknij przycisk „Wyświetl instancje”
Tutaj możesz zobaczyć, że instancja została utworzona i znajduje się w fazie „Inicjowania”. W ciągu minuty lub dwóch możesz zobaczyć, jak Twoja instancja działa
Tymczasem utwórzmy instancję RDS
== Utwórz RDS Aurora z instancją MySql na AWS ==
Ponownie kliknij pasek wyszukiwania u góry strony i tym razem wyszukaj âÃÂÃÂRDSâÃÂÃÂ. Kliknij wynik, aby przejść do pulpitu nawigacyjnego RDS
Na pulpicie nawigacyjnym RDS kliknij przycisk âÃÂÃÂUtwórz bazę danychâÃÂÃÂ, aby skonfigurować i utworzyć instancję RDS
Wybierz metodę âÃÂÃÂŁatwe tworzenieâÃÂÃÂ, âÃÂÃÂAmazon AuroraâààTyp silnika, âÃÂÃÂDev/TestâÃÂàRozmiar instancji DB w następujący sposób
Przewiń trochę w dół i podaj identyfikator klastra âÃÂÃÂDB jako „my-Nodejs- baza danychâÃàMożesz podać dowolną wybraną nazwę, ponieważ jest to tylko nazwa nadana instancji RDS; sugerowałbym jednak użycie tej samej nazwy, aby nie pomylić się podczas wykonywania kolejnych kroków
Określ także główną nazwę użytkownika jako âÃÂÃÂadminâÃÂÃÂ, jego hasło, a następnie kliknij âÃÂàUtwórz bazę danychâÃÂÃÂ
Spowoduje to zainicjowanie tworzenia instancji RDS Amazon Aurora. Należy pamiętać, że w środowiskach produkcyjnych lub na żywo nie wolno ustawiać prostych nazw użytkowników i haseł
Tutaj możesz zobaczyć, że instancja jest w stanie „Tworzenie”. W ciągu około 5-10 minut instancja powinna być uruchomiona
Zrób tutaj kilka notatek:
- Instancja RDS Amazon Aurora będzie domyślnie prywatna, co oznacza, że instancja RDS Amazon Aurora nie będzie dostępna ze świata zewnętrznego i będzie dostępna tylko w VPC
- Instancja EC2 i instancja RDS należą do tego samego VPC
- Instancja RDS jest osiągalna z instancji EC2
== Zainstaluj zależności na instancji EC2 ==
Teraz możesz połączyć się z utworzoną przez nas instancją. Nie będę wchodził w szczegóły, jak połączyć się z instancją i wierzę, że już to wiesz
Klient MySQL
Będziemy potrzebować klienta MySQL, aby połączyć się z instancją RDS Amazon Aurora i utworzyć w niej bazę danych. Połącz się z instancją EC2 i wykonaj z niej następujące polecenia
- Sudo trafna aktualizacja
- sudo apt install mysql-client
Utwórz tabelę
Będziemy potrzebować tabeli w naszej instancji RDS Amazon Aurora do przechowywania danych naszej aplikacji. Aby utworzyć tabelę, połącz się z instancją Amazon RDS Aurora za pomocą klienta MySQL, który zainstalowaliśmy na instancji EC2 w poprzednim kroku
Skopiuj punkt końcowy bazy danych z instancji Amazon Aurora
Wykonaj następujące wspólne z poprawnymi wartościami
- mysql -u
-p -h
Here, my command looks as follows
- mysql -u admin -padmin1234 -h my-Nodejs-database.cluster-cxxjkzcl1hwb.eu-west-3.rds.amazonAWS.com
Once you get connected to the Amazon RDS Aurora instance, execute the following commands to create a table named âÃÂÃÂusersâÃÂÃÂ
show databases; use main; CREATE TABLE IF NOT EXISTS users(id int NOT NULL AUTO_INCREMENT, username varchar(30), email varchar(255), age int, PRIMARY KEY(id select * from users;
Refer to the following screenshot to understand command executions
Create an Application Directory
Now, letâÃÂÃÂs create a directory where we will store all our codebase and configuration files
- pwd
- cd /home/ubuntu/
- mkdir Nodejs-docker
- cd Nodejs-docker
Clone the code repository on the EC2 instance
Clone my Github Repository containing all the code. This is an optional step, I have included all the code in this document
- pwd
- cd /home/ubuntu/
- git clone httpsgithub.com/shivalkarrahul/DevOps.git
- cp /home/ubuntu/DevOps/AWS/Nodejs-docker/* /home/ubuntu/Nodejs-docker
**Note: **This is an optional step. If you copy all the files from the repository to the application directory then you do not need to create files in the upcoming steps; however, you will still need to make the necessary changes
== Deploy Nodejs app to AWS EC2 instance using a Docker container, RDS Amazon Aurora, Nginx with HTTPS, and access it using the Domain Name ==
Docker, why use docker in your ec2 instance
Docker is a containerization tool used to package our software application into an image that can be used to create Docker Containers. Docker helps to build, share and deploy our applications easily
The first step of Dockerization is installing Docker
Install Docker
- Check Linux Version
- cat /etc/issue
- Update the apt package index
- sudo apt-get update
- Install packages to allow apt to use a repository over HTTPS
- sudo apt-get install apt-transport-https ca-certificates curl gnupg lsb-release
- Add DockerâÃÂÃÂs official GPG key:
- curl -fsSL httpsdownload.docker.com/linux/ubuntu/gpg | sudo gpg âÃÂÃÂdearmor -o /usr/share/keyrings/docker-archive-keyring.gpg
- Set up the stable repository
- echo âÃÂÃÂdeb [arch=amd64 signed-by=/usr/share/keyrings/docker-archive-keyring.gpg] httpsdownload.docker.com/linux/ubuntu $(lsb_release -cs) stableâÃÂà| sudo tee /etc/apt/sources.list.d/docker.list > /dev/null
- Update the apt package index
- sudo apt-get update
- Install the latest version of Docker Engine and containerd
- sudo apt-get install docker-ce docker-ce-cli containerd.io
- Check Docker version
- docker âÃÂÃÂversion
- Manage Docker as a non-root user
- Create âÃÂÃÂdockerâÃÂàgroup
- sudo groupadd docker
- Add your user to the docker group
- sudo usermod -aG docker
- Exit
- exit
- Login back to the terminal
- Verify that you can run docker commands without sudo
- docker run hello-world
- Upon executing the above run command, you should see the output as follows
- Refer to the following screenshot to see the command that I have executed
Dockerize your Node.js application in the EC2 instance
Once you have Docker installed, the next step is to Dockerize the app. Dockerizing a Nodejs app means writing a Dockerfile with a set of instructions to create a Docker Image
LetâÃÂÃÂs create Dockerfile and a sample Nodejs app
- pwd
- cd /home/ubuntu/Nodejs-docker
- Create Dockerfile and paste the following in it, alternatively, you can copy the content from here as well
- vim Dockerfile
#Base Image node:12.18.4-alpine FROM node:12.18.4-alpine #Set working directory to /app WORKDIR /app #Set PATH /app/node_modules/.bin ENV PATH /app/node_modules/.bin:$PATH #Copy package.json in the image COPY package.json ./ #Install Packages RUN npm install express --save RUN npm install mysql --save #Copy the app COPY . ./ #Expose application port EXPOSE 3000 #Start the app CMD ["node", "index.js"]
- Create index.js and paste the following in it, alternatively, you can copy the content from here as well. This will be our sample Nodejs app
- vim index.js
const express = require('express const app = express const port = 3000; const mysql = require('mysql const con = mysql.createConnection({ host: "my-Nodejs-database.cluster-cxxjkzcl1hwb.eu-west3.rds.amazonAWS.com", user: "admin", password: "admin1234"app.getstatus', (req, res) => res.send({status: "I'm up and running app.listen(port, () => console.log(`Dockerized Nodejs Applications is listening on port ${port app.postinsert', (req, res) => { if (req.query.username && req.query.email && req.query.age) { console.log('Received an insert call con.connect(function(err) { con.query(`INSERT INTO main.users (username, email, age) VALUES req.query.username req.query.email req.query.age function(err, result, fields) { if (err) res.send(err); if (result) res.send({username: req.query.username, email: req.query.email, age: req.query.age if (fields) console.log(fields);} else { console.log('Something went wrong, Missing a parameter }app.getlist', (req, res) => { console.log('Received a list call con.connect(function(err) { con.query(`SELECT * FROM main.users`, function(err, result, fields) { if (err) res.send(err); if (result) res.send(result);
In the above file, change values of the following variables with the one applicable to your RDS Amazon Aurora instance:
- host: âÃÂÃÂmy-Nodejs-database.cluster-cxxjkzcl1hwb.eu-west-3.rds.amazonAWS.comâÃÂÃÂ
- user: âÃÂÃÂadminâÃÂÃÂ
- password: âÃÂÃÂadmin1234âÃÂÃÂ
- Create package.json and paste the following in it, alternatively, you can copy the content from here as well
- vim package.json
{
âÃÂÃÂnameâÃÂÃÂ: âÃÂÃÂNodejs-dockerâÃÂÃÂ,
âÃÂÃÂversionâÃÂÃÂ: âÃÂÃÂ12.18.4âÃÂÃÂ,
âÃÂÃÂdescriptionâÃÂÃÂ: âÃÂÃÂNodejs on ec2 using docker containerâÃÂÃÂ,
âÃÂÃÂmainâÃÂÃÂ: âÃÂÃÂindex.jsâÃÂÃÂ,
âÃÂÃÂscriptsâÃÂÃÂ: {
âÃÂÃÂtestâÃÂÃÂ: âÃÂÃÂecho \âÃÂÃÂError: no test specified\âÃÂà&& exit 1âÃÂó
},
âÃÂÃÂauthorâÃÂÃÂ: âÃÂÃÂRahul ShivalkarâÃÂÃÂ,
âÃÂÃÂlicenseâÃÂÃÂ: âÃÂÃÂISCâÃÂÃÂ
}
Update the AWS Security Group
To access the application, we need to add a rule in the Security Group to allow connections on port 3000. As I said earlier, we can access the application on port 3000, but it is not recommended. Keep reading to know our recommendations
- Go to the EC2 Dashboard, select the instance, switch to the âÃÂÃÂSecurityâÃÂàtab, and then click on the Security groups link
- Select the âÃÂÃÂInbound rulesâÃÂàtab and click on the âÃÂÃÂEdit inbound rulesâÃÂàbutton
- Add a new rule that will allow external connection from âÃÂÃÂMyIpâÃÂàon the âÃÂÃÂ3000âÃÂàport
Learn more with our blog How to Dockerize a Node.js application
Deploy the node.js server on the EC2 Server (Instance)
- LetâÃÂÃÂs build a docker image from the code that we have
- cd /home/ubuntu/Nodejs-docker
- docker build -t Nodejs
- Start a container using the image that we just build and expose it on port 3000
- docker run âÃÂÃÂname Nodejs -d -p 3000:3000 Nodejs
- You can see the container is running
- docker ps
- You can even check the logs of the container
- docker logs Nodejs
Now we have our Nodejs App Docker Container running
- Now you can access the application from your browser on port 3000
- Check the status of the application on /status api using the browser. httppublic-ip-of-ec2-instance>:3000/status
- You can insert some data in the application on /insert api using the Postman app using POST request
httppublic-ip-of-ec2-instance>:3000/insert?username=abc&[email protected]&age=2
- You can list the data from your application by using /list api from the browser
httppublic-ip-of-ec2-instance>:3000/list
- Alternatively, you can use the curl command from within the EC2 instance to check status, insert data, list data
- curl -XGET âÃÂÃÂhttppublic-ip-of-ec2-instance>:3000/listâÃÂÃÂ
- curl -XPOST âÃÂÃÂhttppublic-ip-of-ec2-instance>:3000/insert?username=abc&email=[email protected]&age=26âÃÂó
- Stop and remove the container
- docker stop Nodejs
- docker rm Nodejs
In this section, we tried to access APIs available for the application directly using the Public IP:Port of the EC2 instance. However, exposing non-standard ports to the external world in the Security Group is not at all recommended. Also, we tried to access the application over the HTTP protocol, which means the communication that took place from the Browser to the Application was not secure and an attacker can read the network packets
To overcome this scenario, it is recommended to use Nginx
Nginx setup
LetâÃÂÃÂs create an Nginx conf that will be used within the Nginx Container through a Docker Volume. Create a file and copy the following content in the file, alternatively, you can copy the content from here as well
- cd /home/ubuntu/Nodejs-docker
- mkdir nginx-conf
- vim nginx-conf/nginx.conf
server {
listen 80;
listen 80;
location ~ /.well-known/acme-challenge {
allow all;
root /var/www/html;
}
location / {
rewrite ^ httpshost$request_uri? permanent;
}
} server { listen 443 ssl http2; listen 443 ssl http2; server_name Nodejs.devopslee.com www.Nodejs.devopslee.com;
server_tokens off;
ssl_certificate /etc/letsencrypt/live/Nodejs.devopslee.com/fullchain.pem;
ssl_certificate_key /etc/letsencrypt/live/Nodejs.devopslee.com/privkey.pem;
ssl_buffer_size 8k;
ssl_dhparam /etc/ssl/certs/dhparam-2048.pem;
ssl_protocols TLSv1.2 TLSv1.1 TLSv1;
ssl_prefer_server_ciphers on;
ssl_ciphers ECDH+AESGCM:ECDH+AES256:ECDH+AES128:DH+3DES:!ADH:!AECDH:!MD5;
ssl_ecdh_curve secp384r1;
ssl_session_tickets off;
ssl_stapling on;
ssl_stapling_verify on;
resolver 8.8.8.8;
location / {
try_files $uri @Nodejs;
}
location @Nodejs {
proxy_pass httpNodejs:3000;
add_header X-Frame-Options "SAMEORIGIN" always;
add_header X-XSS-Protection "1; mode=block" always;
add_header X-Content-Type-Options "nosniff" always;
add_header Referrer-Policy "no-referrer-when-downgrade" always;
add_header Content-Security-Policy "default-src * data: 'unsafe-eval' 'unsafe-inline'" always;
}
root /var/www/html;
index index.html index.htm index.nginx-debian.html;
}
In the above file make changes in the 3 lines mentioned below. Replace my subdomain.domain, i.e. Nodejs.devopslee, with the one that you want and have
- server_name Nodejs.devopslee.com www.Nodejs.devopslee.com;
- ssl_certificate /etc/letsencrypt/live/Nodejs.devopslee.com/fullchain.pem;
- ssl_certificate_key /etc/letsencrypt/live/Nodejs.devopslee.com/privkey.pem;
Why do you need Nginx in front of the node.js service?
Our Nodejs application runs on a non-standard port 3000. Nodejs provides a way to use HTTPS; however, configuring the protocol and managing SSL certificates that expire periodically within the application code base, is something we should not be concerned about
To overcome these scenarios, we need to have Nginx in front of it with SSL termination and forward user requests to Nodejs. Nginx is a special type of web server that can act as a reverse proxy, load balancer, mail proxy, and HTTP cache. Here, we will be using Nginx as a reverse proxy to redirect requests to our Nodejs application and have SSL termination
Why not Apache?
Apache is also a web server and can act as a reverse proxy. It also supports SSL termination; however, there are a few things that differentiate Nginx from Apache. Due to the following reasons, mostly Nginx is preferred over Apache. LetâÃÂÃÂs see them in short
- Nginx has a single or a low number of processes, is asynchronous and event-based, whereas Apache tries to make new processes, new threads for every request in every connection
- Nginx is lightweight, scalable, and easy to configure. On the other hand, Apache is great but has a higher barrier to learning
Docker-Compose
LetâÃÂÃÂs install docker-compose as we will need it
- Download the current stable release of Docker Compose
- sudo curl -L âÃÂÃÂhttpsgithub.com/docker/compose/releases/download/1.29.2/docker-composeuname -suname -m)âÃÂà-o /usr/local/bin/docker-compose
- Apply executable permissions to the docker-compose binary we just downloaded in the above step
- sudo chmod +x /usr/local/bin/docker-compose
- Test if the installation was successful by checking the docker-compose version
- docker-compose âÃÂÃÂversion
- Create a docker-compose.yaml file, alternatively you can copy the content from here as well. This will be used to spin the docker containers of our application tech stack that we have
- cd /home/ubuntu/Nodejs-docker
- vim docker-compose.yml
version: '3'
services:
Nodejs:
build:
context:
dockerfile: Dockerfile
image: Nodejs
container_name: Nodejs
restart: unless-stopped
networks:
- app-network
webserver:
image: nginx:mainline-alpine
container_name: webserver
restart: unless-stopped
ports:
- "80:80"
- "443:443"
volumes:
- web-root:/var/www/html
- ./nginx-conf:/etc/nginx/conf.d
- certbot-etc:/etc/letsencrypt
- certbot-var:/var/lib/letsencrypt
- dhparam:/etc/ssl/certs
depends_on:
- Nodejs
networks:
- app-network
certbot:
image: certbot/certbot
container_name: certbot
volumes:
- certbot-etc:/etc/letsencrypt
- certbot-var:/var/lib/letsencrypt
- web-root:/var/www/html
depends_on:
- webserver
command: certonly --webroot --webroot-path=/var/www/html --email [email protected] --agree-tos --no-eff-email --staging -d Nodejs.devopslee.com -d www.Nodejs.devopslee.com
#command: certonly --webroot --webroot-path=/var/www/html --email [email protected] --agree-tos --no-eff-email --force-renewal -d Nodejs.devopslee.com -d www.Nodejs.devopslee.com
volumes:
certbot-etc:
certbot-var:
web-root:
driver: local
driver_opts:
type: none
device: /home/ubuntu/Nodejs-docker/views/
o: bind
dhparam:
driver: local
driver_opts:
type: none
device: /home/ubuntu/Nodejs-docker/dhparam/
o: bind
networks:
app-network:
driver: bridge
In the above file make changes in the line mentioned below. Replace my subdomain.domain, i.e. Nodejs.devopslee, with the one that you want and have. Change IP for your personal Email
âÃÂÃÂemail EMAIL, Email used for registration and recovery contact
- command: certonly âÃÂÃÂwebroot âÃÂÃÂwebroot-path=/var/www/html âÃÂÃÂemail [email protected] âÃÂÃÂagree-tos âÃÂÃÂno-eff-email âÃÂÃÂstaging -d Nodejs.devopslee.com -d www.Nodejs.devopslee.com
Update the AWS security groups
This time, expose ports 80 and 443 in the security group attached to the EC2 instance. Also, remove 3000 since it is not necessary, because the application works through port 443
Include the DNS change
Here, I have created a sub-domain âÃÂÃÂNodejs.devopslee.comâÃÂàthat will be used to access the sample Nodejs application using the domain name rather than accessing using an IP
You can create your sub-domain on AWS if you already have your domain
Create 2 âÃÂÃÂType A RecordsetsâÃÂàin the hosted zone with a value as EC2 instancesâÃÂàpublic IP
One Recordset will be subdomain.domain.com and the other will be www.subdomain.domain.com
Here, I have created Nodejs.devopslee.com and www.Nodejs.devopslee.com, both pointing to the Public IP of the EC2 instance
**Note: **I have not assigned any Elastic IP to the EC2 instance. It is recommended to assign an Elastic IP and then use it in the Recordset so that when you restart your EC2 instance, you donâÃÂÃÂt need to update the IP in the Recordset because public IPs change after the EC2 instance is restarted
Now, copy values of the âÃÂÃÂType
NS RecordsetâÃÂÃÂ, we will need these in the next steps
Go to the Hosted zone of your domain and create a new âÃÂÃÂRecordâÃÂàwith your subdomain.domain.com adding the NS values you copied in the previous step
Now, you have a sub-domain that you can use to access your application
In my case, I can use Nodejs.devopslee.com to access the Nodejs application. We are not done yet, now the next step is to secure our Nodejs web application
Include the SSL certificate
LetâÃÂÃÂs generate our key that will be used in Nginx
- cd /home/ubuntu/Nodejs-docker
- mkdir views
- mkdir dhparam
- sudo openssl dhparam -out /home/ubuntu/Nodejs-docker/dhparam/dhparam-2048.pem 2048
Deploy Nodejs app to EC2 instance
We are all set to start our Nodejs app using docker-compose
This will start our Nodejs app on port 3000, Nginx with SSL on port 80 and 443. Nginx will redirect requests to the Nodejs app when accessed using the domain. It will also have a Certbot client that will enable us to obtain our certificates
- docker-compose up
After you hit the above command, you will see some output as follows. You must see a message as âÃÂÃÂSuccessfully received certificatesâÃÂÃÂ
**Note The above docker-compose command will start containers and will stay attached to the terminal. We have not used the -d option to detach it from the terminal
You are all set, now hit the URL in the browser and you should have your Nodejs application available on HTTPS
You can also try to hit the application using the curl command
- List the data from the application
- Insert an entry in the application
- Again list the data to verify if the data has been inserted or not
- Check the status of the application
- Hit the URL in the browser to get a list of entries in the database
- httpsNodejs.devopslee.com/list
Auto-Renewal of SSL Certificates
Certificates we generate using LetâÃÂÃÂs Encrypt are valid for 90 days, hence we need to have a way to renew our certificates automatically so that we donâÃÂÃÂt end up with expired certificates
To automate this process, letâÃÂÃÂs create a script that will renew certificates for us and a cronjob to schedule the execution of this script
- Create a script with âÃÂÃÂdry-run to test our script
- vim renew-cert.
bin/bash
COMPOSEusr/local/bin/docker-compose --no-ansi"
DOCKERusr/bin/docker"
cd /home/ubuntu/Nodejs-docker/
$COMPOSE run certbot renew --dry-run && $COMPOSE-s SIGHUP webserver
$DOCKER system prune -af
- Change permissions of the script to make it executable
- chmod 774 renew-cert.
- Create a cronjob
- sudo crontab -e
*/5 /home/ubuntu/Nodejs-docker/renew-cert.>> /var/log/cron.log 2>&1
- List the cronjobs
- sudo crontab -l
- Check logs of the cronjob after 5 mins, as we have set a cronjob to be executed on every 5th minute
- tail -f /var/log/cron.lo
In the above screenshot, you can see a âÃÂÃÂSimulating renewal of an existing certificate message. This is because we have specified the âÃÂÃÂâÃÂÃÂdry-runâÃÂàoption in the script
- LetâÃÂÃÂs remove the âÃÂÃÂâÃÂÃÂdry-runâÃÂàoption from the script
- vim renew-cert.
bin/bash
COMPOSEusr/local/bin/docker-compose --no-ansi"
DOCKERusr/bin/docker"
cd /home/ubuntu/Nodejs-docker/
$COMPOSE run certbot renew && $COMPOSE-s SIGHUP webserver
$DOCKER system prune -af
This time you wonâÃÂÃÂt see such a âÃÂÃÂSimulating renewal of an existing certificate message. This time the script will check if there is any need to renew the certificates, and if required will renew the certificates else will ignore and say âÃÂÃÂCertificates not yet due for renewalâÃÂÃÂ
== What is next on how to deploy the Nodejs app to AWS? ==
We are done with setting up our Nodejs application using Docker on AWS EC2 instance; however, there are other things that come into the picture when you want to deploy a highly available application for production and other environments. The next step is to use an Orchestrator like ECS or EKS to manage our Nodejs application at the production level. Replication, Auto-scaling, Load Balancing, Traffic Routing, Monitoring container health does not come out of the box with Docker and Docker-Compose. For managing containers and microservices architecture at scale, you need a Container Orchestration tool like ECS or EKS
Also, we did not use any Docker Repository to store our Nodejs app Docker Image. You can use AWS ECR, a fully managed AWS container registry offering high-performance hosting
If you want to create a cloud-native architecture, check out our video What is a Cloud-Native Architecture and how to adopt it?
== Conclusion ==
To deploy Nodejs app to AWS does not mean just creating a Nodejs application and deploying it on the AWS EC2 Instance with a self-managed database. There are various aspects like Containerizing the Nodejs App, SSL Termination, Domain for the app that come into the picture when you want to speed up your Software Development, Deployment, Security, Reliability, Data Redundancy
In this article, we saw the steps to dockerize the sample Nodejs application, use AWS RDS Amazon Aurora and deploy Nodejs app to ec2 instance using Docker and Docker-Compose. We enabled SSL termination to our sub-domain to be used to access the Nodejs application. We saw the steps to automate domain validation and SSL certificate creation using Certbot along with a way to automate certificate renewal that is valid for 90 days
This is enough to get started with a sample Nodejs application; however, when it comes to managing your real-time applications, 100s of microservices, 1000s of containers, volumes, networking, secrets, egress-ingress, you need a Container Orchestration tool. There are various tools like self-hosted Kubernetes, AWS ECS, AWS EKS that you can leverage to manage the container life cycle in your real-world applications
== FAQs ==
**Why do we need to deploy Nodejs app to AWS using Nginx
To deploy Nodejs app to AWS with SSL Termination requires changes in the code of the Nodejs. So, rather than making HTTPS configuration in the code and managing it on our own and being worried about it, it is better to use Nginx that can be used for the SSL termination and can act as a Reverse proxy to redirect requests to our Nodejs application
**Why do we need to use the SSL Termination for our Nodejs application
When communication takes place between a client and a server, i.e. between the browser and the Nodejs application, over theconnection, there are high chances of data theft, attacks on the server. To overcome such risks, it is always recommended to enable SSL Termination and communicate over a secured connection
**Why do we need to use a Container Orchestration Tool to manage our containers
Managing a few containers using docker CLI, or managing 10s of containers using docker-compose is fine. This does stand true when you have 100s and 1000s of micro-services, containers on multiple environments like Dev, QA, Staging, Prod. To not only manage containers but log management, monitoring, networking, load balancing, testing, and secrets management you need some kind of tool called a Container Orchestrator. There are various Container Orchestration tools like ECS or EKS that can help you manage your containers and other moving parts
**Can I deploy a Nodejs application on any other Cloud than AWS or Do I need to deploy Nodejs app to AWS
Yes, of course. You can deploy your Nodejs app on any Cloud. However, while choosing a Cloud provider there are a few areas of consideration as follows that one must think of
Certifications & Standards
Global Infrastructure
Data redundancy:
Low Latency Content Delivery:
Affordable Compute, Network and Storage solutions
Pricing model
Technologies & Service Roadmap
Contracts,& SLAs